Easy Way to Plasti Dip the Mustang Logo on Grill
How to Plasti-Dip Car Emblems or Grilles
Auto Faction enjoys maintaining, improving, and modding cars.
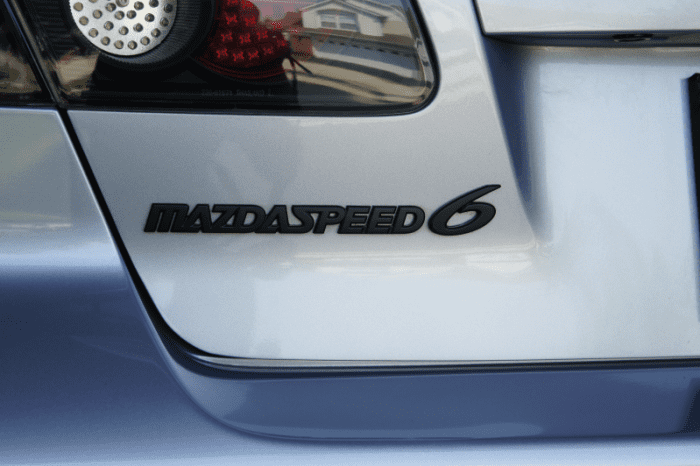
A Plasti Dip coated Mazdaspeed6 emblem
Want to Plasti-Dip Your Tires or Grilles?
Today I'm going to guide you through Plasti-Dipping car emblems or grilles. Plasti-Dip is ever-growing in popularity, and this technique is a great way to change the look of your car and protect surfaces temporarily. You can do this on wheels, interior pieces, and other trim as well, but today we're going to focus on emblems and grilles.
What Is Plasti-Dip?
Plasti-Dip is a rubberized coating that you can apply to surfaces to temporarily change colors and add protection. The material is only a temporary covering because it can be peeled up by hand at any time to restore the original finish of the part. Despite the ease with which Plasti-Dip can be removed, it is very durable and should have a lifespan similar to that of vinyl coverings if it is applied correctly.
Applying the Plasti-Dip
Before you begin the process of applying Plasti-Dip to any surfaces, make sure you gather the necessary materials. You'll need:
Scroll to Continue
Read More from AxleAddict
- a sponge
- soapy water
- a towel
- a roll of masking or painters tape
- a toothpick
You might want to consider both 2" and 1/2" masking tape if both are available. You may also want to grab some of Plasti-Dip's new glossifier or metallizer enhancers. These add a glossy, metallic silver, or metallic gold appearance to the normally matte finish of Plasti-Dip. The actual application of Plasti-Dip for emblems or grilles is quite simple and the same process is used for both surfaces.
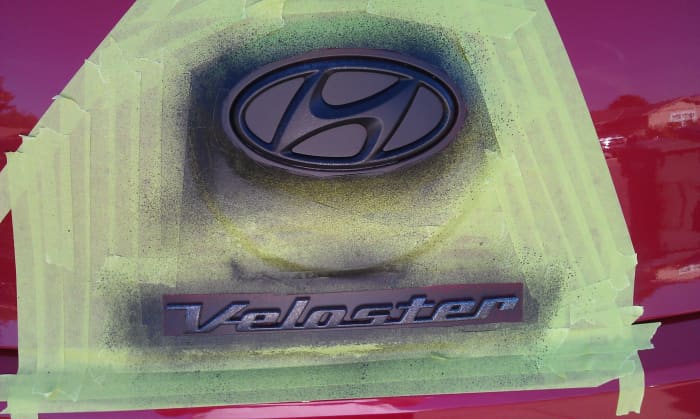
Masking off the emblem of a Hyundai Veloster
Veloster.org
Masking off the Emblem
- Clean the surfaces that you plan on spraying with Plasti Dip and dry them thoroughly. Any wax or residue will keep the coating from sticking completely and the finish may be less durable.
- Tape off the areas around the grille or emblem, make sure to leave a bit of a gap between the surface you want to cover and the tape. You actually want some of the car's paint to show between the emblem/grille surface and the tape. If you tape too closely then the tape will pull up the Plasti Dip from the emblem or grille surface. Unlike with wheels, we're spraying something directly on the car body here, so it's best to tape off a large area to reduce overspray. These larger areas are where the wider masking tape may be useful.
- The first coat of Plasti Dip should be very light. When the first coat is dried it should still be fairly transparent and the original color of the surface should still show through. When spraying you want to use the same type of motions as you would with spray paint. Keep the can about 6" away from the surface you're trying to cover and move in evenly paced arcing motions and make sure to cover angled surfaces that may appear hidden from certain perspectives. Let this coat dry for 15 to 20 minutes before moving to the next step.
- The second coat should be applied much in the same fashion as the first. Again, spray very lightly and try to avoid build-ups of spray in any one area as this may cause drips or bubbles. Let this coat dry for 15 to 20 minutes as well.
- The third coat will be our final coat here, and the idea is to cover any areas that might not be completely coated by the first two coats. Give the surfaces 30 to 40 minutes to dry this time, just to be sure that it's safe to handle.
- If you want to add a gloss or metallic finish to the Plasti Dip, you would want to do that now, before we peel up the tape. The metalizer enhancers spray on heavily, so make sure to begin very lightly. You may not need more than one coat, but if you want a very gold or silver finish then feel free to do multiple coats, letting each dry in between. If you apply the glossifier or metalizer enhancers then let the last coat dry another 30 or 40 minutes before moving on.
- When removing the tape go very slowly and avoid pulling up too much of the tape at one time, this may remove some of the Plasti Dip on the emblems. When the Plast Dip directly around the edge of the emblem begins to lift, slow down even more, and be sure to take your time slowly pulling it off. This will peel off the remainder of the excess Plasti Dip and outline the emblem.
- If your emblem has internal surfaces that you want to remove Plasti Dip from (such as the spaces inside of a letter or number) then use a toothpick to roll the Plasti Dip together and gently peel this up. This is also a great method to use if you have a solid emblem with internal etching and want to keep the lettering chrome but the surface of the emblem the color of Plasti Dip. It might be helpful to cut off the tip of the toothpick so that you have a fairly rounded surface to work with. This will roll the Plasti Dip better than a sharp point.
Good to Go!
That's it, you're done! If you've done the job properly you should now have a durable and stylish coat of Plasti Dip on your car emblems or grille.
This article is accurate and true to the best of the author's knowledge. Content is for informational or entertainment purposes only and does not substitute for personal counsel or professional advice in business, financial, legal, or technical matters.
Related Articles
Source: https://axleaddict.com/cars/How-to-Plasti-Dip-Car-Emblems-or-Grilles
0 Response to "Easy Way to Plasti Dip the Mustang Logo on Grill"
Post a Comment